Enabling the FaxPress server’s Backup service during the server setup process allows you to make sure user files and data are protected, and can be easily restored using the Premier’s Restore utility in case any unexpected system damage or failure should occur.
Running the System Backup service allows the FaxPress server system files, user information, and fax job data to be backed up to a designated sharable folder on the network.
These configuration, user mapping, registry settings, and faxes stored in the backup folder cannot be accessed until the System Restore utility is run. The Restore command allows those files to be returned to either the original FaxPress server, or copied to a new, specified FaxPress server following any server or hard disk replacement.
Starting the Restore feature automatically stops all other services.
To enable the System Backup feature, follow these steps:
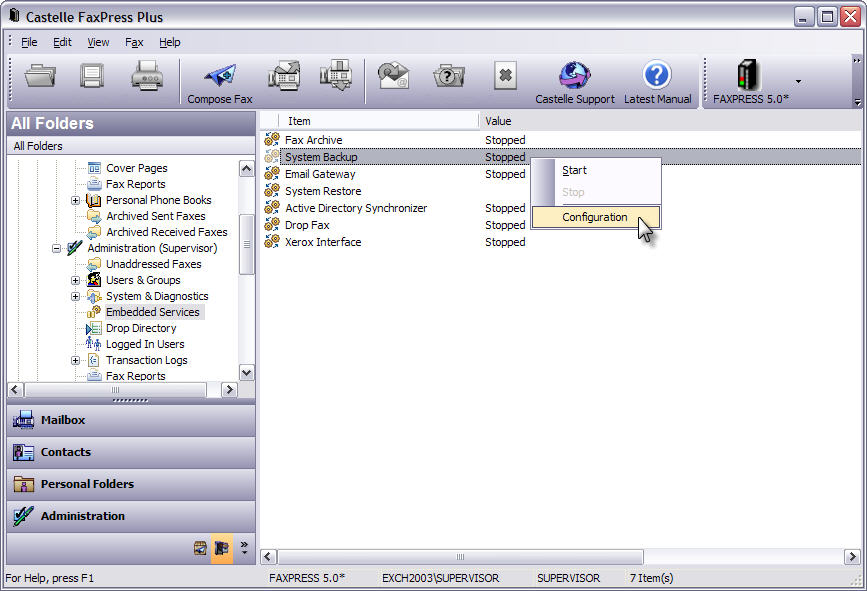
| 1. | Log into FaxPress Plus as Administrator, or as a user with Administrator privileges, and select the Administration folder view. |
| 2. | Select the Embedded Services folder. |
| 3. | Right-click on System Backup and select Configuration. |
| 4. | The Backup Service window contains the Configuration tab. |
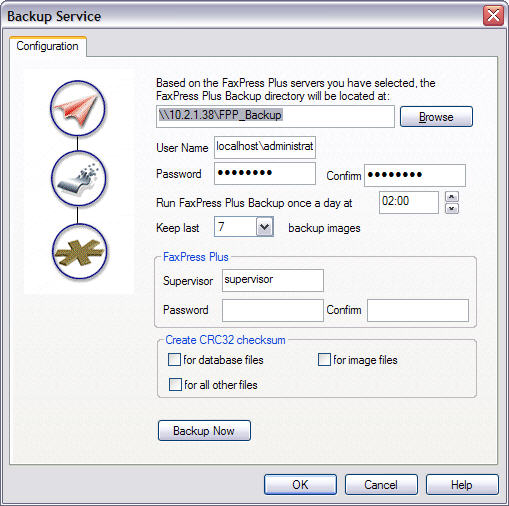
In the Configuration tab:
Use the Browse button to specify a sharable network folder. The minimum space required to back up a basic configuration is 700 MB.
Enter a User Name and Password for the Premier’s Backup service to use in logging onto the workstation where the Backup directory is located. Be sure to Confirm the password.
Specify how frequently the Backup service should be run.
Specify how many backup images the FaxPress server should retain. Up to 30 backup images can be kept.
In the Supervisor field, enter an account with supervisor privileges, or the Supervisor account name itself, along with the Supervisor Password. Be sure to Confirm the Supervisor password. The Backup Service will use this account to log onto the Premier and retrieve information to add to the Backup directory.
TheCreate CRC32 checksum section enables validation of the backup file to ensure its integrity. A checksum is created a backup time and at restore time; if the checksums do not match, the file's integrity has been compromised in some manner, and restore cannot take place. To enable the checksum, select the checkbox next to the type of file(s) you wish to validate.
The Restore utility can only be run on a FaxPress Plus server, and not a FaxPress server. The Restore utility will go to the Backup directory, retrieve the backed up FaxPress Plus server system files, user information, and fax job data, and configure the target Premier with the backup information. The target Premier is always the one running the Restore utility.
The Restore utility will overwrite any existing settings on the target Premier server.
To enable the FaxPress server’s System Restore utility, follow these steps:
| 1. | Log into FaxPress Plus as Supervisor, or as a user with Supervisor privileges, and select the Administration folder view. |
| 2. | Select the Embedded Services folder. |
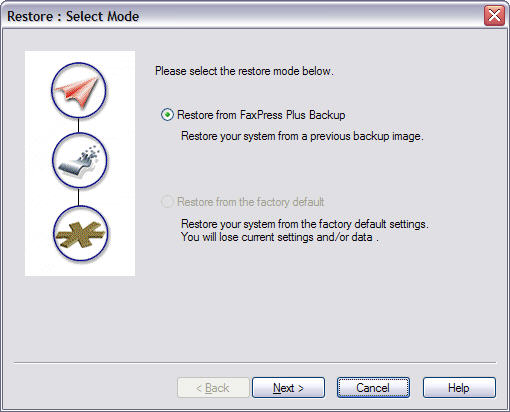
| 3. | Right-click on System Restore and select Configuration. The Select Mode window opens. Select the Restore from FaxPress Plus Backup option. |
Restoring From a Backup File
To restore system data from a backup file, first follow the procedure above to enable a system restore, then take the following steps.
| 1. | When you reach the Select Mode window shown above, select the Restore from FaxPress Plus Backup option, then click Next. The Select Backup Image window opens. Browse to and select the backup file you want to restore from, then enter the domain, user name and password for the Administrator with rights to the backup file. Then click Next. |

| 2. | The Select Option window opens. Select the Restore Everything option and click Next. 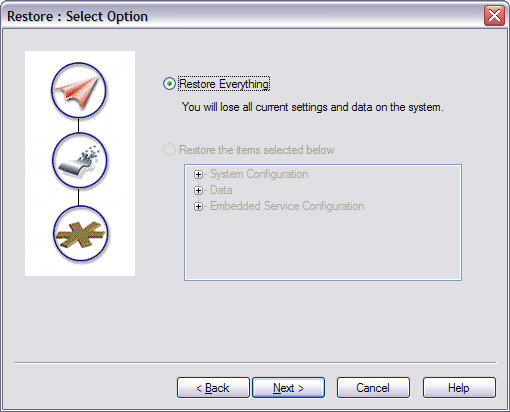 |
| 3. | The Report window opens. Click the checkbox for the Email Restore Report option if you want the FaxPress server administrator to get an email report on Restore process. Fill out the email server IP address and the email address for the Administrator. |

| 4. | The Summary window appears. Check the items listed and make sure you have configured the restore the way you want. If you need to make changes, click Back. If not, then click Next. |

| 5. | A message box appears, with tips and procedures you need to follow as part of the restore process. |
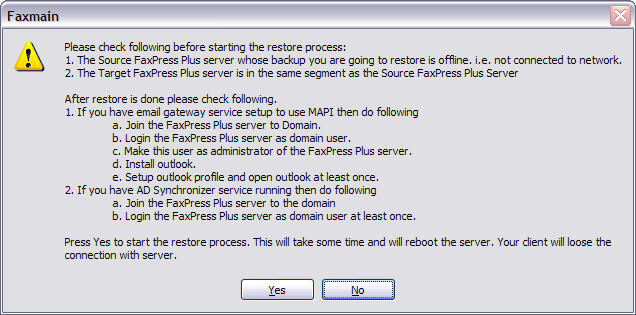
Take notes on these tips and procedures as necessary, then click Yes to begin the restore process. A progress message box appears. The target FaxPress Plus server system will reboot when the restore is complete. Follow the instructions of the message box above to finish the process.
|
FaxPress Premier WebHelp
Last Updated: 11/1/2007
E-mail this page |
Castelle 855 Jarvis Drive, Suite 100 Morgan Hill, CA 95037 Toll-free 800.289.7555 Tel 408.852.8000 Fax 408.852.8100 |